Wednesday 29 December 2021

Line-side - lighting for Signal boxes...walls...station fencing

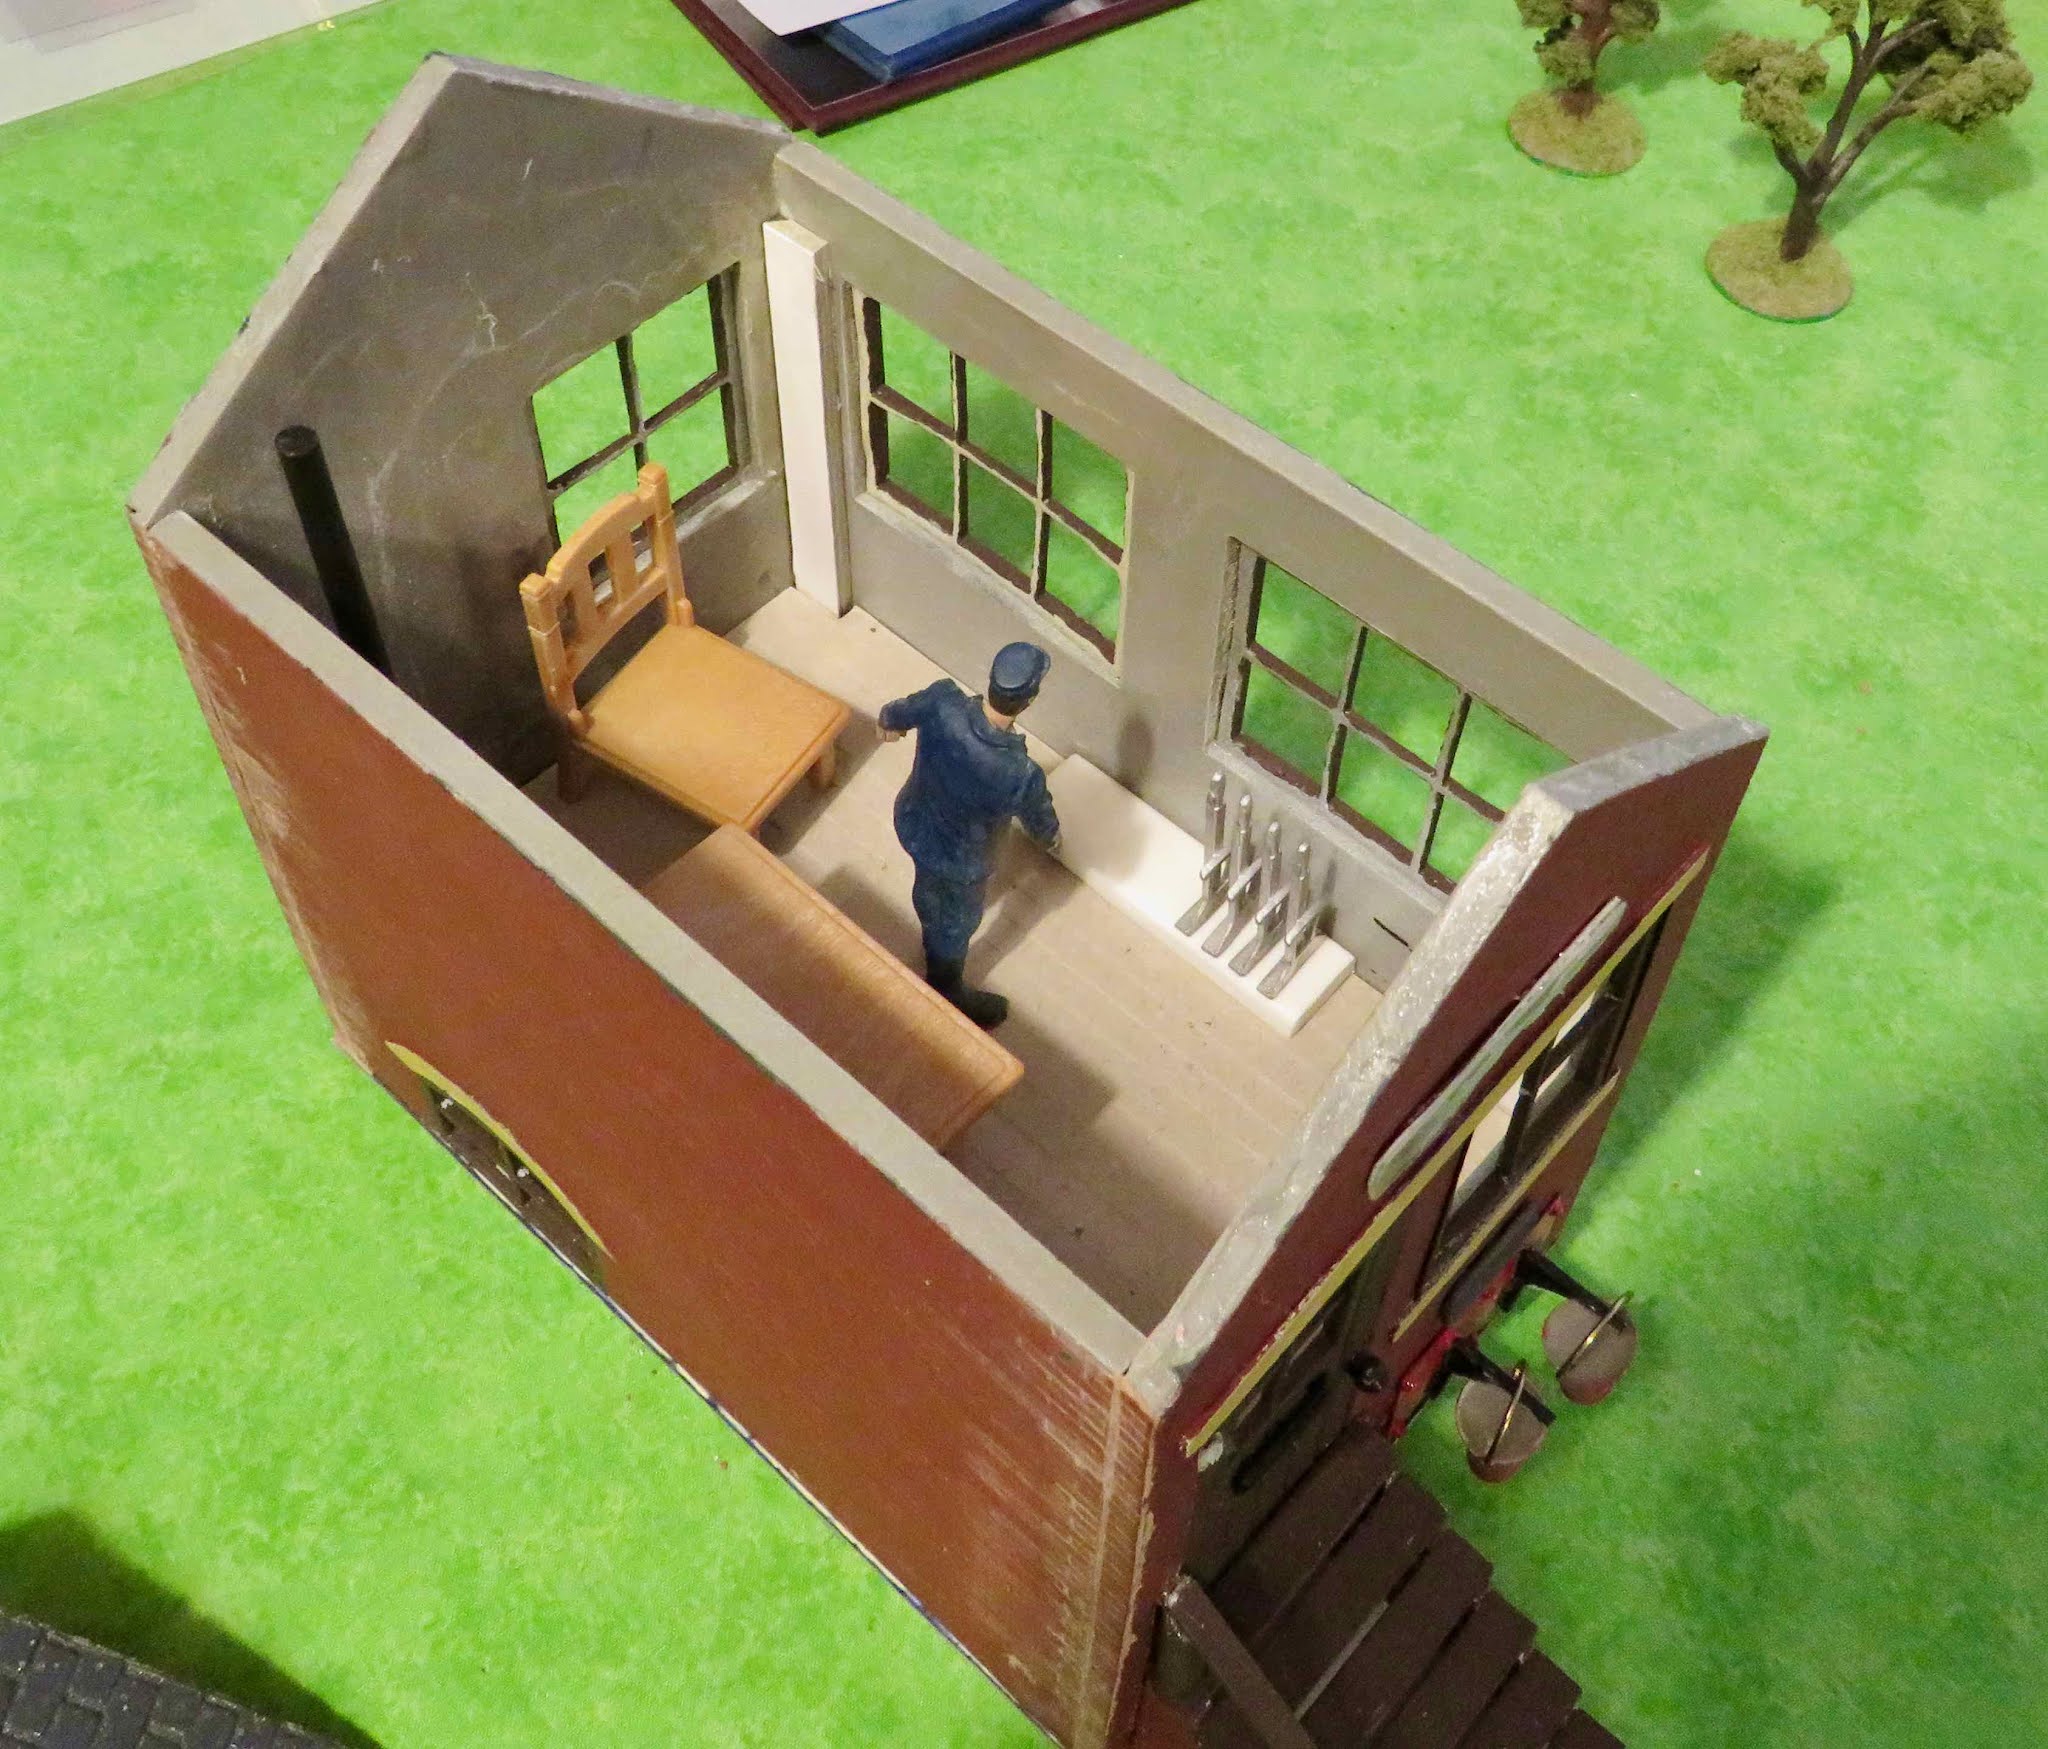
Some lighting for the signal boxes, an LED tea-lite has been placed on the underside of the roof (held on by blu-tak), I  have them switched on during operating sessions...

now you can see inside the signal boxes more easily
Station platform fencing replaced at the halt and added to the main station...

Resin dry stone wall section sprayed in 'stone effect' paint and placed in one corner of the layout


Saturday 18 December 2021

Mess and Tool van for the maintenance train ...

 I've been wanting to add a mess & tool van to my maintenance train for a while.  I purchased a secondhand brake coach off Ebay recently; it had a 32mm wheel set  and was the right length (a tiny bit overlong) to go on a spare LGB two-wheel under frame I had.

The coach taken apart; it's under frame was in a bad state and was discarded.
The styrene roof had a split in it; some glue along the crack got it back together. The coach parts were cleaned, sanded and repairs done as needed. Then all was assembled on the LGB under frame; a lick of paint and varnish and its was ready for use.
in a train with the crane and match truck.


Saturday 11 December 2021

Signal Boxes ...

 Completed the signal boxes (and in the process cleared up the rest of clutter on my Wargames table so I could fill it up again with more....)

The simple interior of one of the signal boxes

with the roofs on (these are removable, may add an interior light at some stage)
In position on the garage layout ...

The signal box that was in the garage has now been moved to outdoor layout (the old one from there is going to a new home).

Wednesday 8 December 2021

More line-side bits and a private owner's van...

My pre-Xmas spending binge on garden railway stuff continues; more items picked up off Ebay arrived this week ..

A selection of resin walls and gates....

Something different for good trains - a private owner van - "Seddon's Salt"

Sunday 5 December 2021

Signal boxes... assembled...(WIP)

 Finished assembling the two signal boxes; I used impact adhesive to fix them together as they are going to be inside on the garage layout.

The roofs can be removed.  Each signal box will have a simple interior of chair, table, wood-stove, lver frame and signal man.

Friday 3 December 2021

line side buildings ....

 The recently acquired line side buildings (apart form the signal box) have had a few repairs and a lick of paint and are now line side on the garage layout.  


Currently working on the signal box and also another smaller one I bought from Pendle Valley Workshop.

Monday 29 November 2021

Private owner coal wagon ...

I thought the wagon I bought recently off Ebay with the coal load  would look nice a private owners one. I removed the side straps; after hunting on the web for a suitable image I used it to make two printed sides for the wagon - I used photo paper but printed on the reverse side to give a smooth surface to stick to the wagon.

I mixed some paint to match the sides and painted the other parts of the wagon; then I stuck the sides on with PVA. The side straps were stuck back on, then a few coats of spray acrylic varnish applied.

This will go nicely with the coal office and man with sack of coal; I have a coal staithe on order - a nice line side feature to add to the garage layout.


Friday 26 November 2021

New items for the line side

 A big parcel arrived today, containing a selection of items off Ebay that I bought to update the line side buildings on my garage layout. The signal box will need to be assembled and along with the rest given a little bit of tlc and a lick of paint as needed. 

Saturday 13 November 2021

Hunslet 0-4-0 Saddle Tank loco - finished

 I have completed the assembly and painted up the loco; keeping the color scheme simple - I left the donor Playmobil chassis as is - the red adds something to the colour scheme

The controller of CVR inspects the new loco ...

Wednesday 10 November 2021

Hunslet 0-4-0 Saddle Tank loco (WIP)

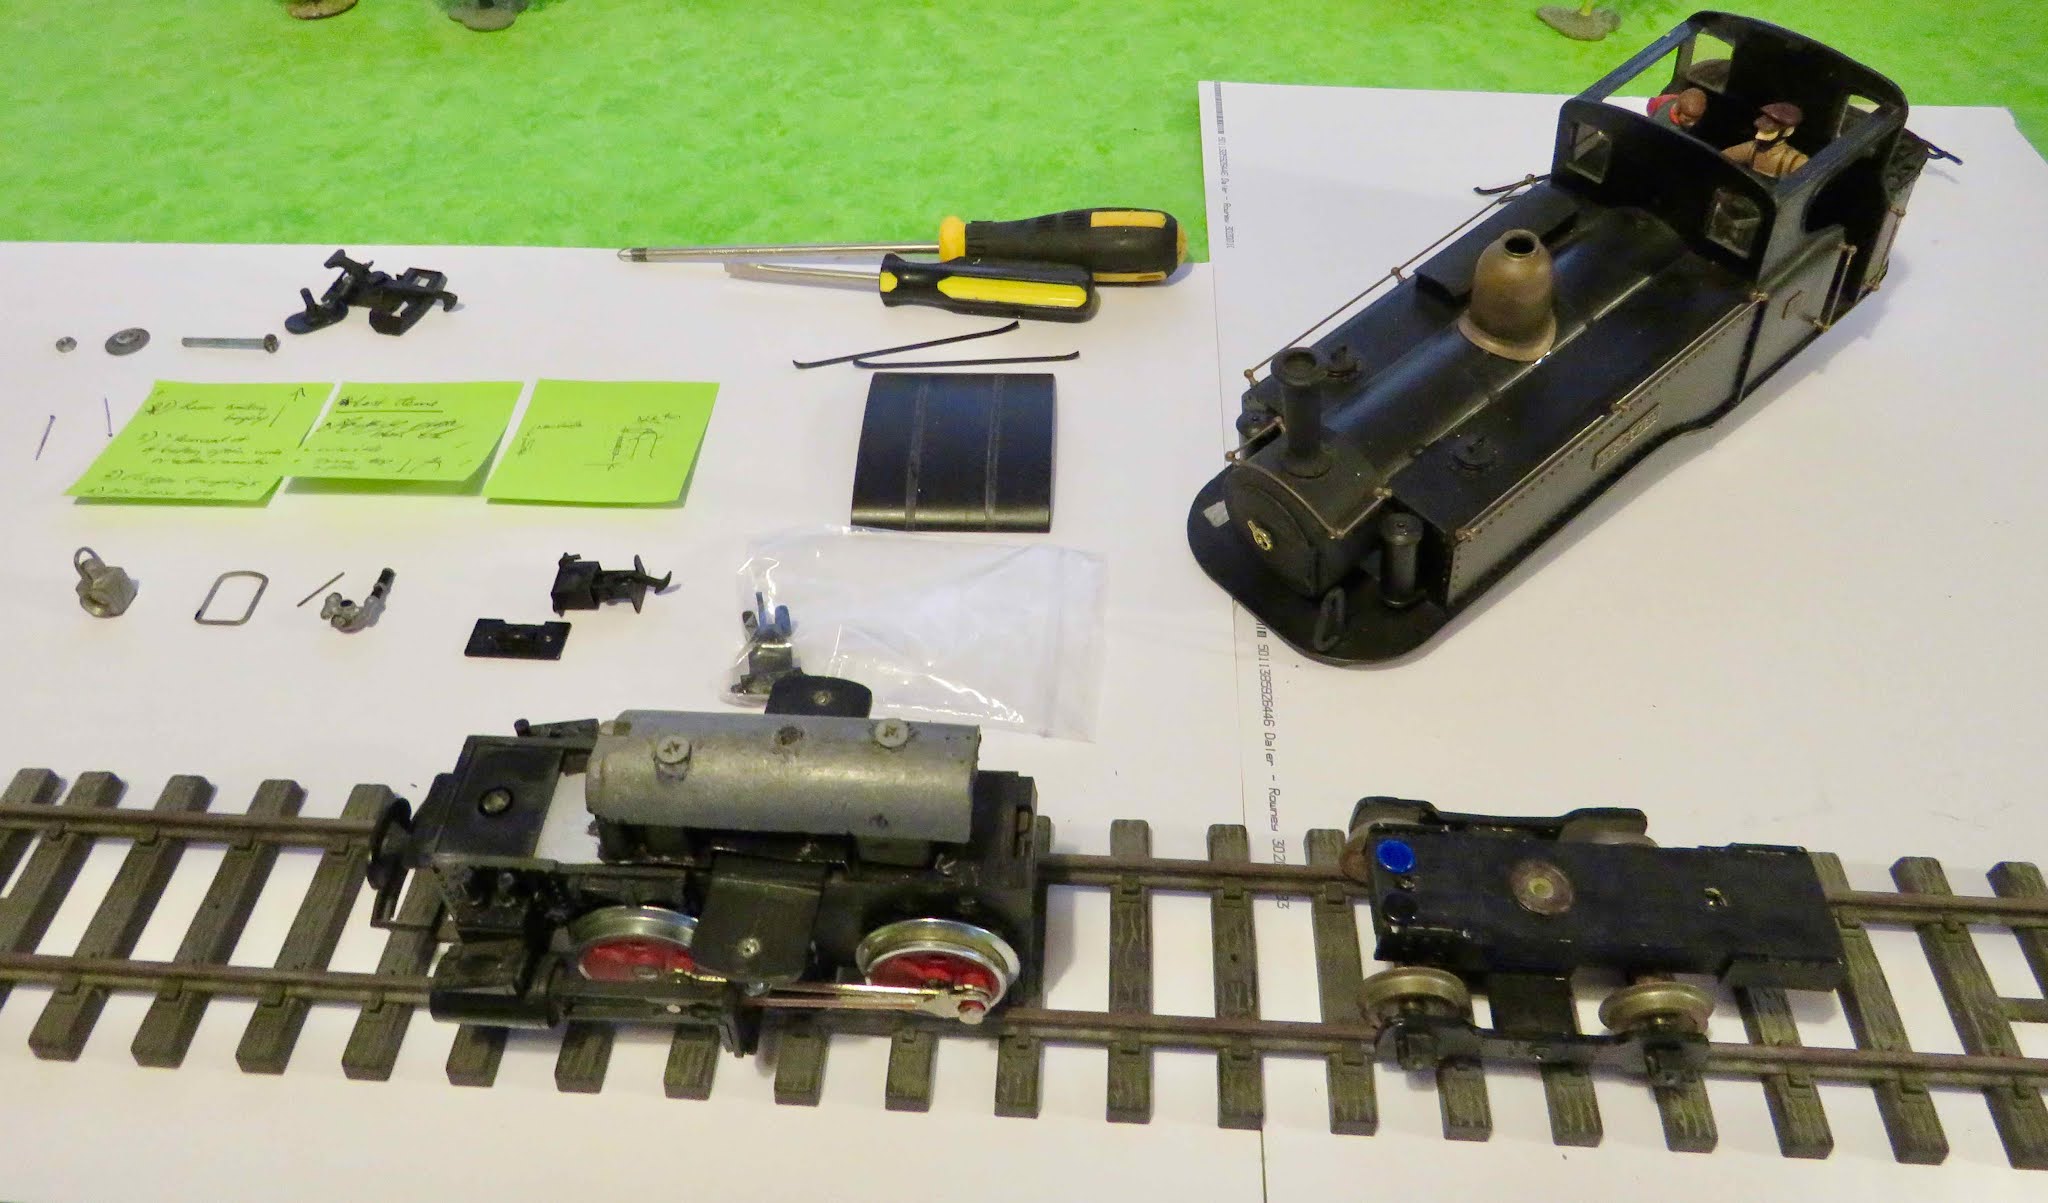
I've been working on adding another locomotive to the Canford Valley Railway motive power; this time a Hunslet 0-4-0 Saddle Tank loco. (using the body kit from GRS - https://www.grsuk.com/shop/HUNSLET-0-4-0-ST-BODY-WITH-CAB-M2470 ).

This loco is going to be battery powered using the chassis from a Playmobil RC loco.  Donor chassis and bits out of the kit box...

footplate on and chopper couplings added..
suitable hole made in the saddle tank for the RC aerial to go through ... saved the coal bunker from the donor  loco, plus assembled the cab interior parts...
trial fit of all parts without the hand rails...
trial assembly with coal bunker, springs and hand-rails added....
a most enjoyable time putting this kit together, next job is to paint the parts and do the final assembly.

Monday 8 November 2021

A visit from the Controller...

 The new Controller of the Canford Valley Railway, Sir Percival Trayne is on a tour of inspection. The new controller is always well dressed and like his cousin Sir Topham Hatt wears a top hat, he is however much slimmer.


Friday 5 November 2021

Single Fairlie on the layout ...

After some TLC, a touch-in of the paintwork and chopper couplings fitted; the single Fairlie has been out on the garage layout....


Wednesday 3 November 2021

Single Fairlie goes into the loco-works ...

 The single Fairlie has been dismantled for some light repair works...

a few loose bits to stick back on and fit some chopper couplings; then can be put back together for a visit to the paint shop for a touch in, keeping the black livery

Tuesday 2 November 2021

Another loco acquired - Single Fairlie

A single fairlie picked up off Ebay; this one will finish off the replacement of my own old scratch built locos.

It runs nicely - a bit of work needed to replace some small missing parts and a few minor repairs - it will be off into the loco works soon.

Saturday 30 October 2021

Odin - a very useful engine ...

 Odin has been to the paint shop and is now in service, first job a bit of shunting ...

it will be a very useful engine ..

Wednesday 27 October 2021

LOCO WORKS - Refurbishing Odin (3) - Running problems..fixed

Opened up the motor block to check the interior - looks ok and no obvious problems...

On deeper inspection found a big hole in the front plastic drive gear, lost a tooth and a bit more - DOH !
So not much option for me than to replace the motor block, fortunately I had a similar one available and started work adapting it to fit - offering up to the footplate section it needs a fixing at front and a few padding pieces...
The replacement motion with adaptations to fit the loco body (using a fixit block at the front)
tender coupling mk2 - a simple hoop of wire - does the job
All re-assembled and on a running test with 4 coaches, occasional slippage so will fit a traction weight on top of the motor block - loco works fine and reverses too with problems (so MK2 coupling a winner)
next job is to tart up the paint work.

Tuesday 26 October 2021

LOCO WORKS - Refurbishing Odin (2) - The Tender

The detail on the tender tip was basic and had no way to add some coal, so the top was removed ..

A new basic top with room for coal was made using cardboard... (sealed with a coat of PVA glue)

Added some coal, cork tile cut in strips and then broken up into pieces, stuck in place with dilute PVA glue...

Monday 25 October 2021

LOCO WORKS - Refurbishing Odin (1)

The loco I acquired last month has now gone into the loco works...

It had on inspection few problems that needed correction

  • funnel not vertical
  • couplings, height mismatches.
  • pickup problems when running (stops, hand jiggle and then starts)
  • tender wheel set
  • repairs needed to tender top.
  • footplate not horizontal
Dis-assembled ....

funnel removed, and found some better screws and bolts for re-assembly
put some padding pieces in to get the footplate horizontal and re-attcahed the funnel
I gave the inside of the cab a brush off to remove the dust

New wheels for the tender and a new coupling for the rear of the tender 
a new coupling for the front of the loco...
The coupling between the tender and the loco was mis-matched
and so I levelled up the height and used a the coupling scheme of 'wire pin- link - wire pin '
which works OK, will probably change it for a more practical less fiddly scheme later on.